← Return to installation guides
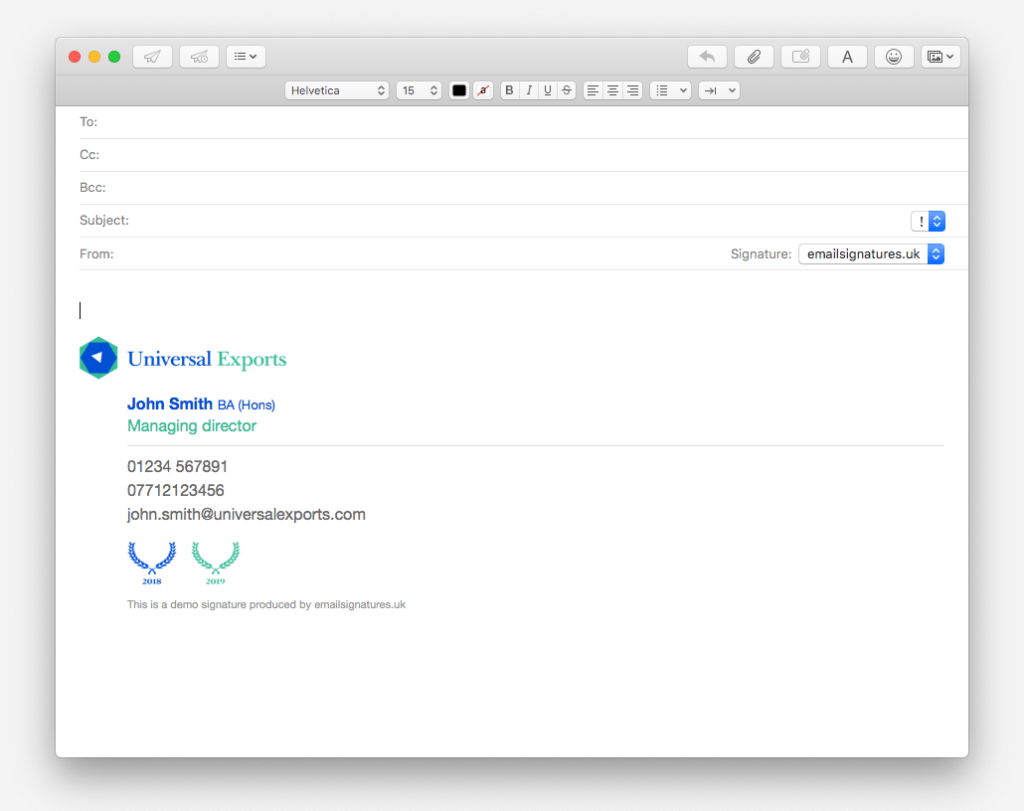
This guide will help you install an HTML email signature properly in Apple Mail. Ensure you follow each step carefully.
Step 1 — Add a new blank signature in Apple Mail
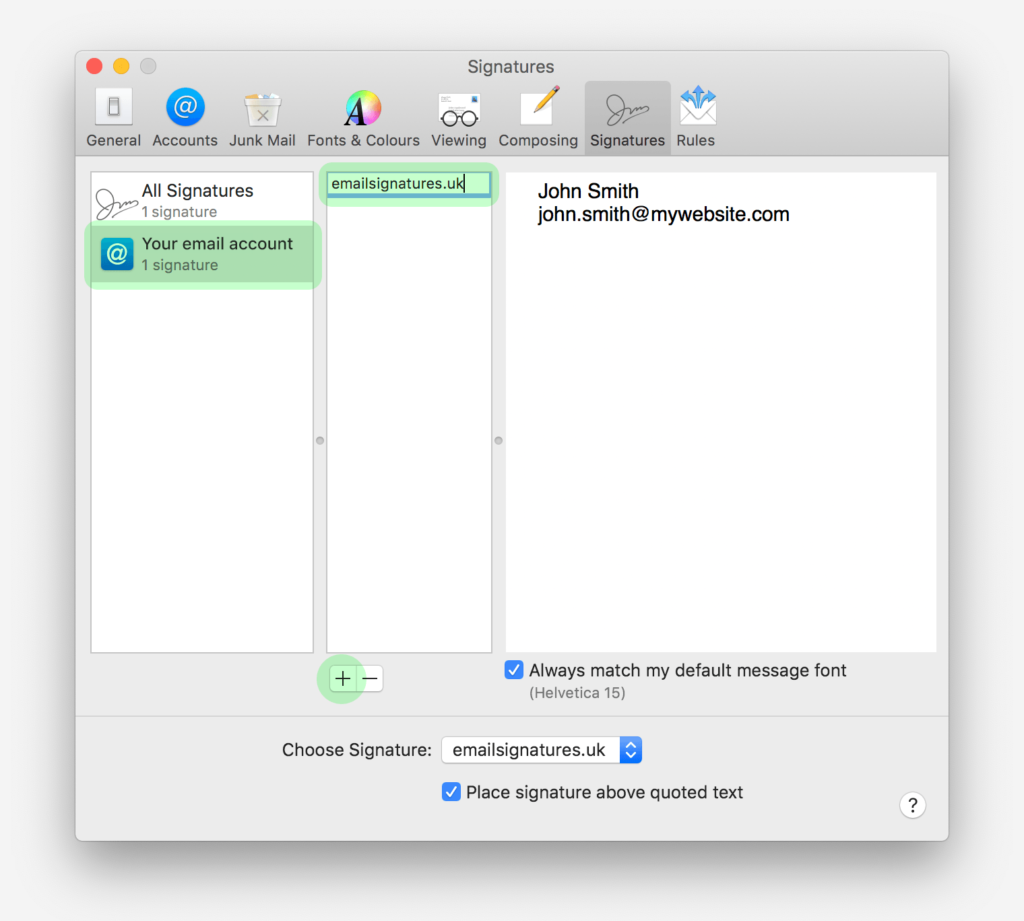
Navigate to the Preferences panel in Apple Mail and follow these steps:
- Click on your chosen email account in the first column
- Add a new signature by clicking the ‘+’ symbol below the second column
- Name the signature ‘emailsignatures.uk’ as above
Do not worry about editing the content of the signature (third column) as we will be replacing this with our own.
Step 2 — Close Apple Mail
Quit the Apple Mail app now by pressing Command(⌘)+Q or going to File > Quit. Don’t overlook this as it is important for future steps.
Step 3 — Navigate to the signature folder
Apple Mail saves this signature to a file on your computer; this is a little hidden but can be found using a short process described below.
Open Finder and click on ‘Go > Go to Folder…’
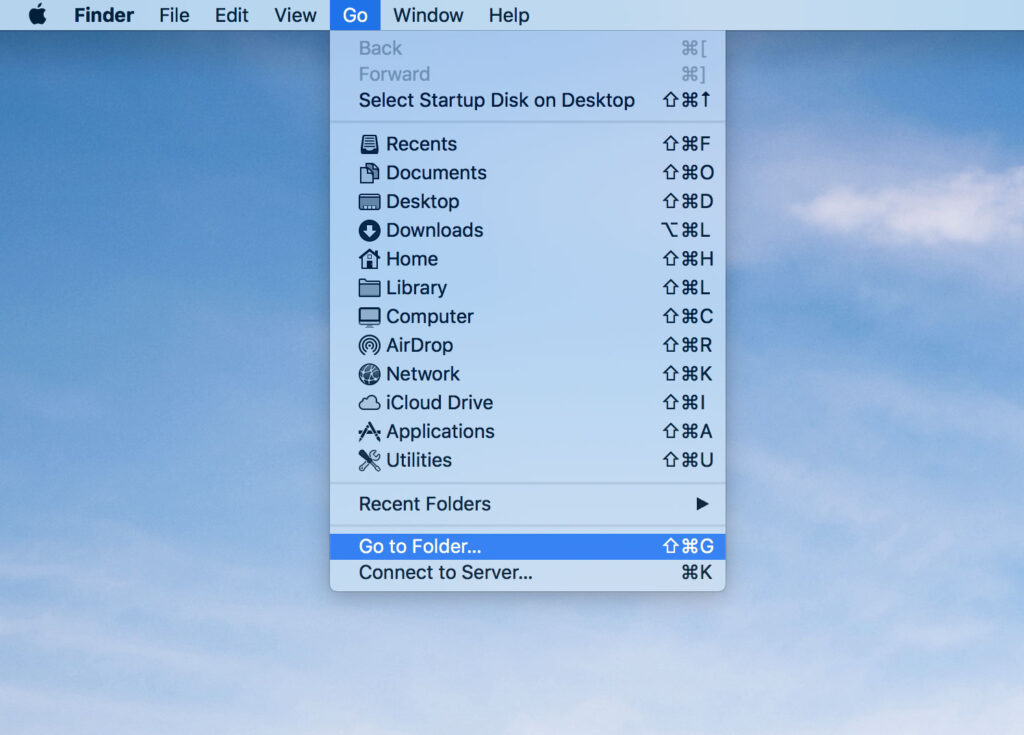
If you are using macOS Big Sur you will be able to paste in this location and it should navigate you automatically to the correct folder on your computer:
~/Library/Mail/V9/MailData/Signatures

Optional (if the above location doesn’t work)
If this doesn’t work it might be that you are using a different version of the operating system. This doesn’t change too much but you will have to manually find the correct folder. You do this by opening your Library:
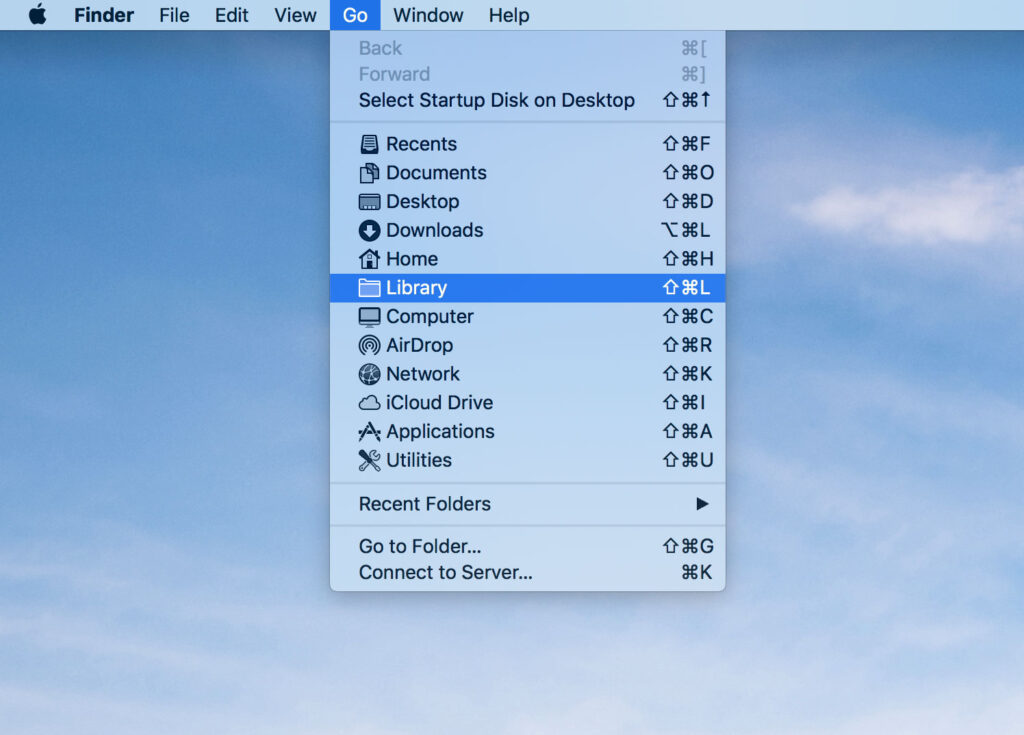
You’ll be presented by a large set of folders but be careful not to move, edit or delete anything here as this could break parts of your system.
- Navigate to the Mail folder
- Now open the highest ‘V’ folder in this directory. This could be named V2, V3, V6, V7, V8 or similar
- Now navigate through MailData > Signatures
Step 4 — Open signature file
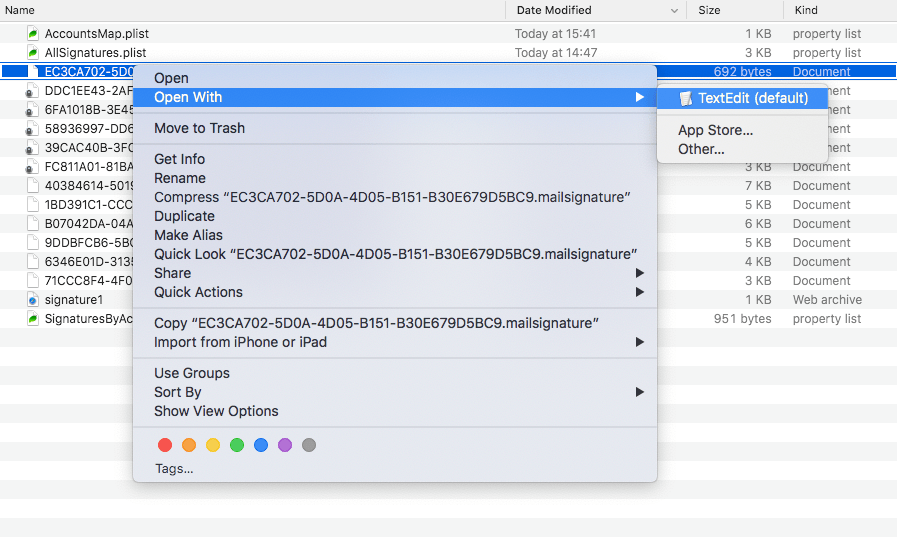
There will be multiple files in this folder but you only want to focus on the files ending with .mailsignature. You need to open the newest .mailsignature file created; if you sort by ‘Date Modified’ you should be able to easily identity the correct one.
Your file name should look something like this:
EC3CA702-5D0A-4D05-B151-B30E679D5BC9.mailsignature
Do not edit any files with a .plist extension.
Right click the file and select ‘Open With’ and choose TextEdit. If this doesn’t appear by default, you’ll have to click ‘Other’ and choose it in your Applications directory. You can choose another preferred text editor here as long as it doesn’t leave any formatting behind. Do not try to use Microsoft Word or anything similar.
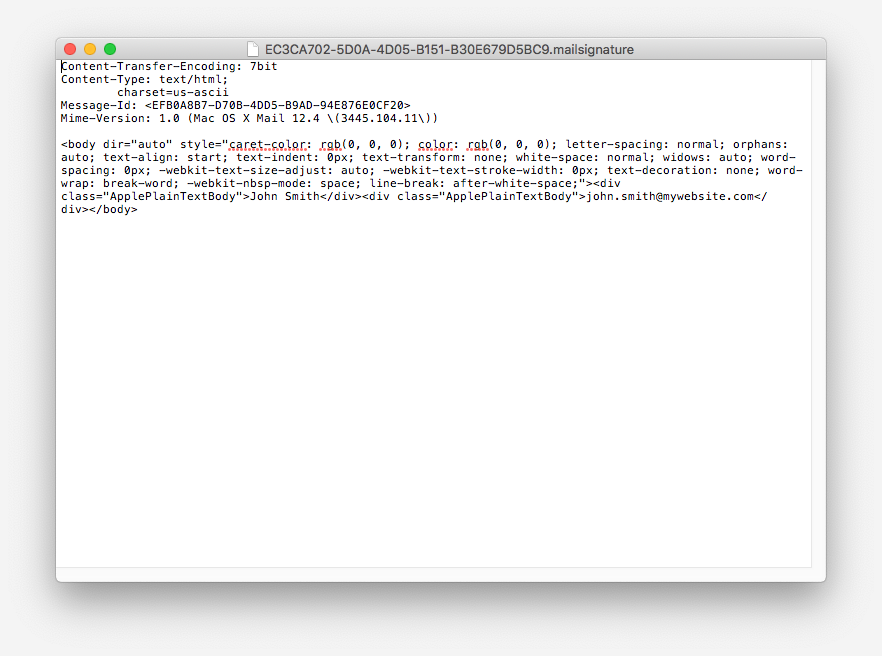
Once opened, your file should look something like this:
Step 5 — Replace signature file content
You’ll need your new email signature HTML for this step. This will either be provided by us or by using our email generator.
If you’re using our generator you can copy the HTML code by clicking the ‘Copy HTML’ button:
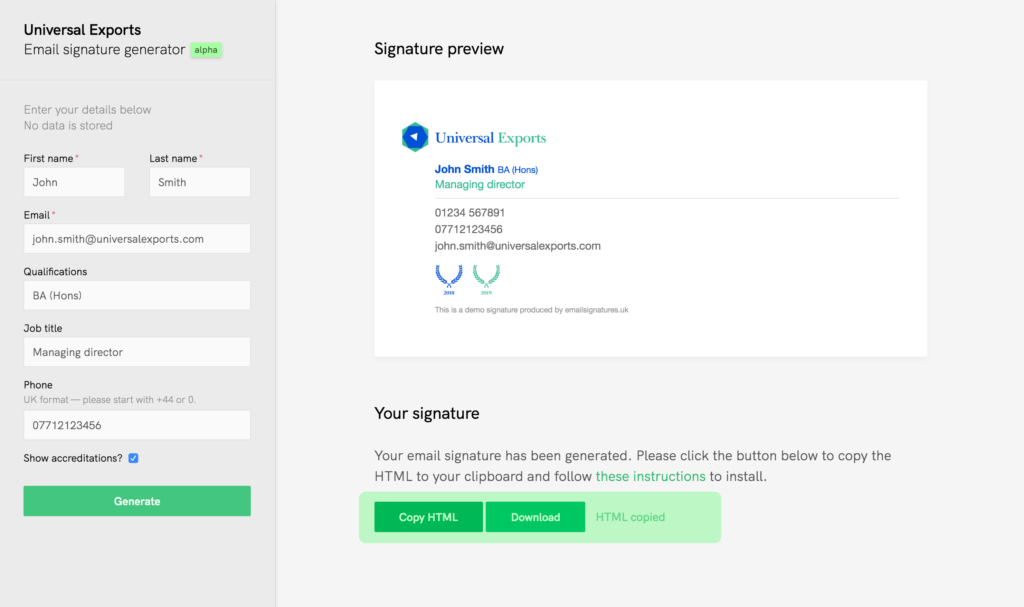
If you’re not using our generator you will just need to also open your HTML file in TextEdit and copy the contents of this.
Once you have the HTML code copied, head back to TextEdit where you should have your blank signature open.
Select everything between and including the <body></body> tags, leaving the header metadata intact:

Now, paste your new HTML code in place of this. Your file should now look similar to this:
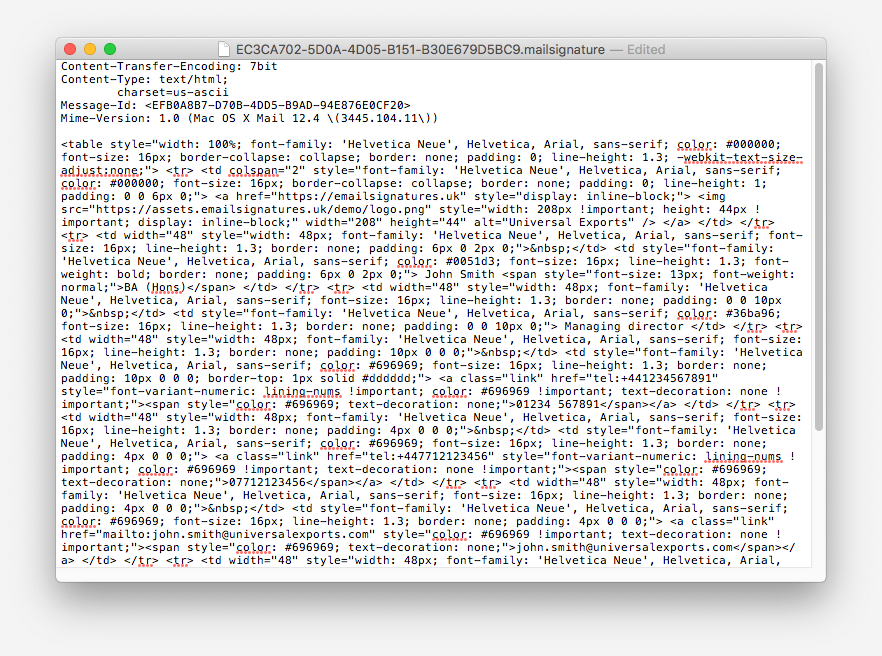
Once this is complete, save and close the file.
Step 6 — Lock file
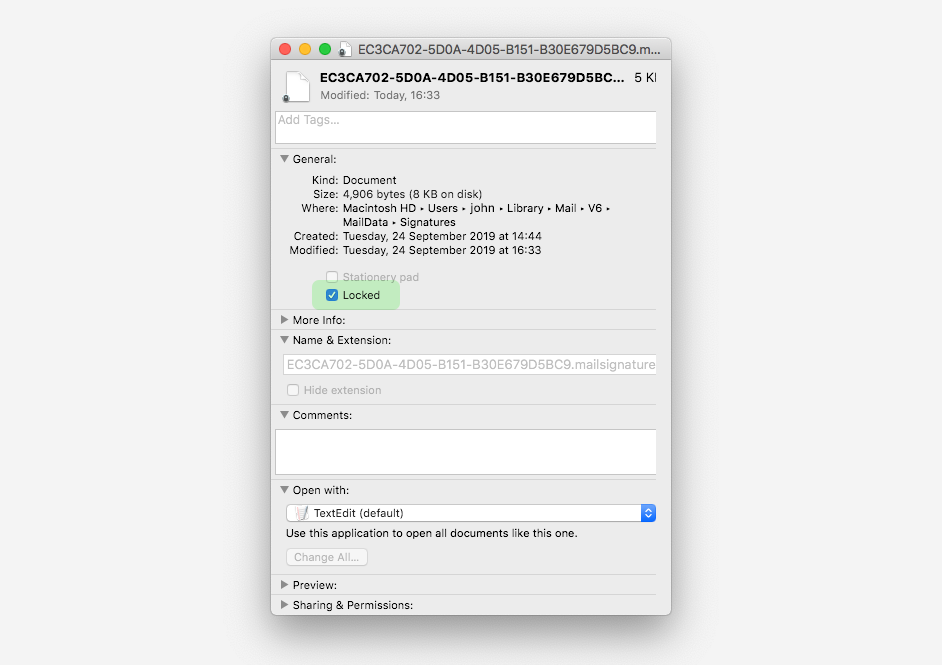
Once saved and closed, right click the file again and select ‘Get Info’. A pop-up panel should appear. Please click on the ‘Locked’ checkbox and then close this panel. This will stop Apple Mail corrupting any of the new custom HTML.
Your signature is now installed!
After locking your email signature, reopen Apple Mail and your new signature should be installed when you start composing a new email!